Some of our customers wanted to add a large number of items to a Mobile Data Collection select list. It would take them ages to do it manually, adding one item at a time. So we helped them do it all at once by using JSON.
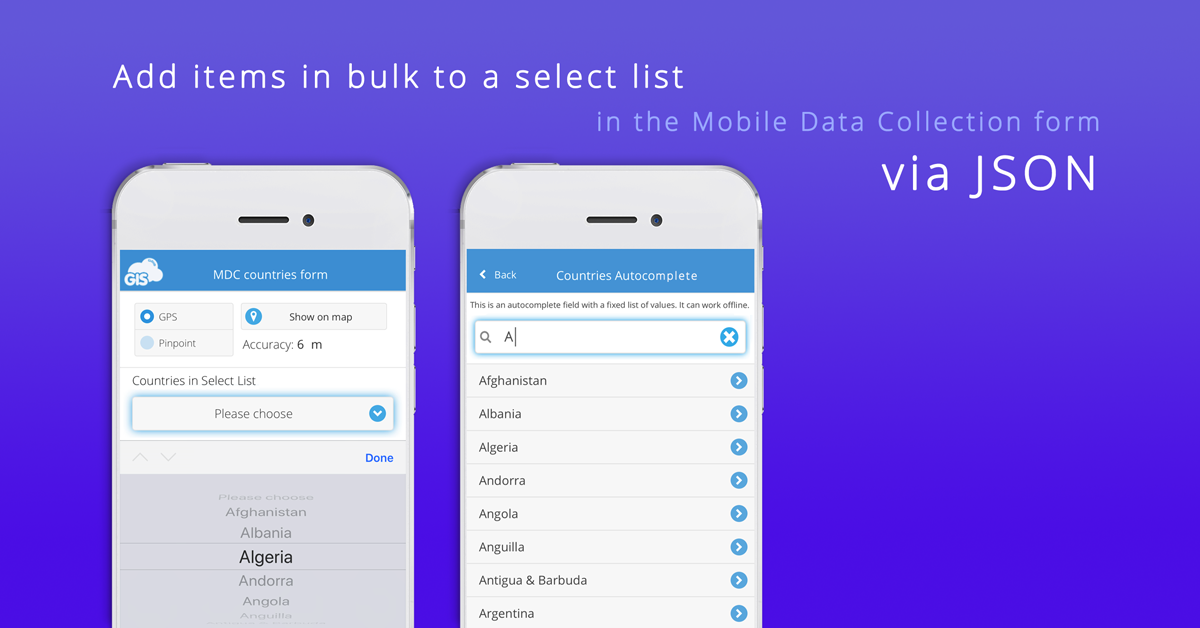
To make things easier for customers in the future we have created this step-by-step guide on how to add multiple items to a Mobile Data Collection select list via JSON.
1. Preparing the data (Excel to JSON)
For example purposes, let’s say we want to create a select list of countries.
First, you’ll need to prepare the data you want to add to a select list. List the items in an Excel file in two columns named ‘value’ and ‘title,’ as shown on the picture below.

The next step is to turn the Excel file to JSON format. You will need an online Excel to JSON generator. Upload the Excel file to the generator to get the JSON code.
The result should look like this example:
[
{
“value”: “Afghanistan”,
“title”: “Afghanistan”
},
{
“value”: “Albania”,
“title”: “Albania”
},
{
“value”: “Algeria”,
“title”: “Algeria”
},
{
“value”: “Andorra”,
“title”: “Andorra”
}
]
2. Loading the custom form in Map Editor
Now that you have the JSON code log in to Map Editor and open the desired project/map.
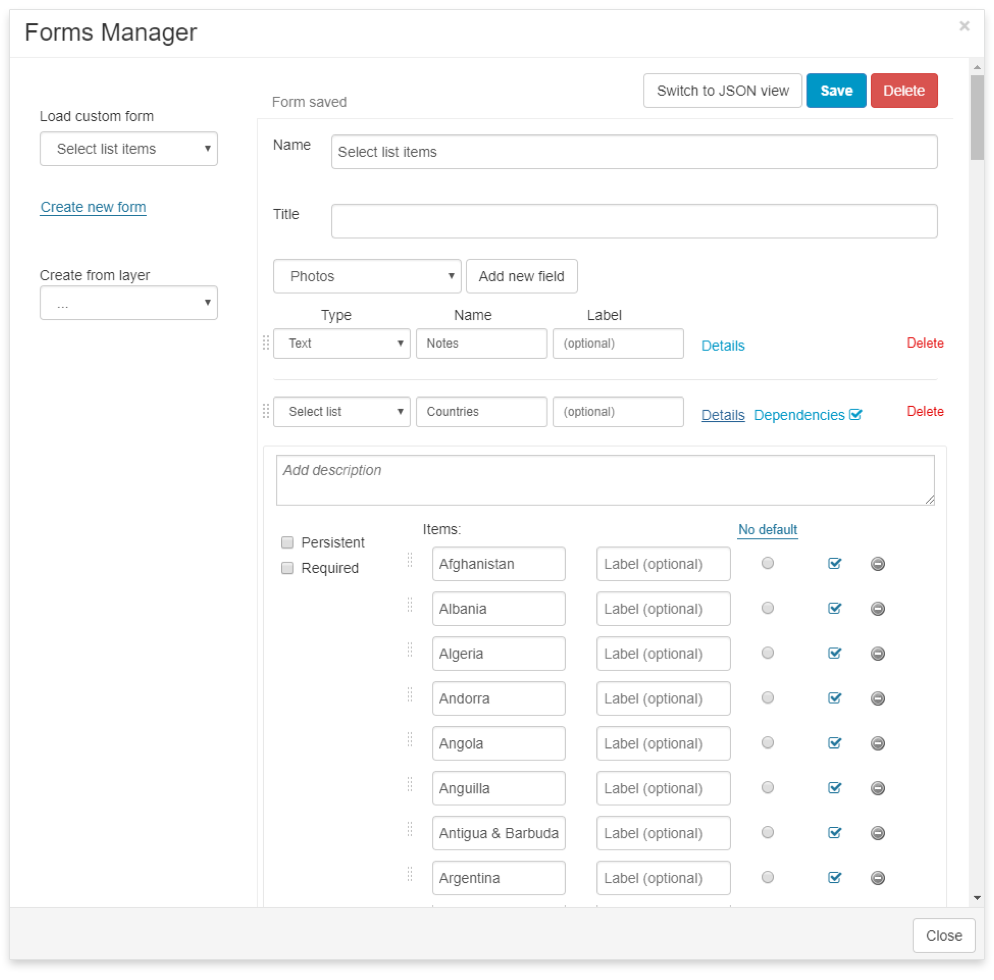
Click the Tools tab and open Forms Manager. Here you can create a new form or load an already available form.
Note: in this tutorial, you are creating forms with Map Editor
Click ‘Load custom form‘ and choose the project you have already created in the Mobile Data Collection Portal. Click ‘Duplicate form‘ and change its name so you can find it easier later. Click Save.
If you wish to create a new form, click Create New Form.
After you have loaded or created the form, click ‘Add new field.’ Choose the type ‘Select list‘ which will represent your category and name it ‘Select list_countries’(in this example we use a list of countries).
3. Adding JSON code to a Select List
Now that the form contains the select list click ‘Switch to JSON view.‘
Locate this part (select list code):
{
“type”: “select”,
“uuid”: “123456-0012-3456-789-12346789”,
“name”: “Select list_countries”,
“persistent”: false,
“required”: false,
“title”: “select”,
“description”: “”,
“options”: [ ]
}
Find the “options“: [ ]
delete [ ] (square brackets)
and paste your JSON code where you deleted the square brackets.
It should look like this:
“options”: [
{
“value”: “Afghanistan”,
“title”: “Afghanistan”
},
{
“value”: “Albania”,
“title”: “Albania”
},
{
“value”: “Algeria”,
“title”: “Algeria”
},
{
“value”: “Andorra”,
“title”: “Andorra”
}
]
Click Save.
Now if you click ‘Switch to designer’ and open the details of your Select list named ‘Select list_countries,’ you’ll see the countries listed.
4. Connecting the form to a layer
Next step is to connect the newly created form to the map layer.
Note: If you created the project in the Mobile Data Collection Portal, it is not possible to edit the layer’s attributes unless you duplicate the map.
Close the Forms Manager. Click ‘Duplicate map‘ and rename the map in Map Properties so you can find it easily later. Open the layers properties to connect the layer and the new form following the instructions here.
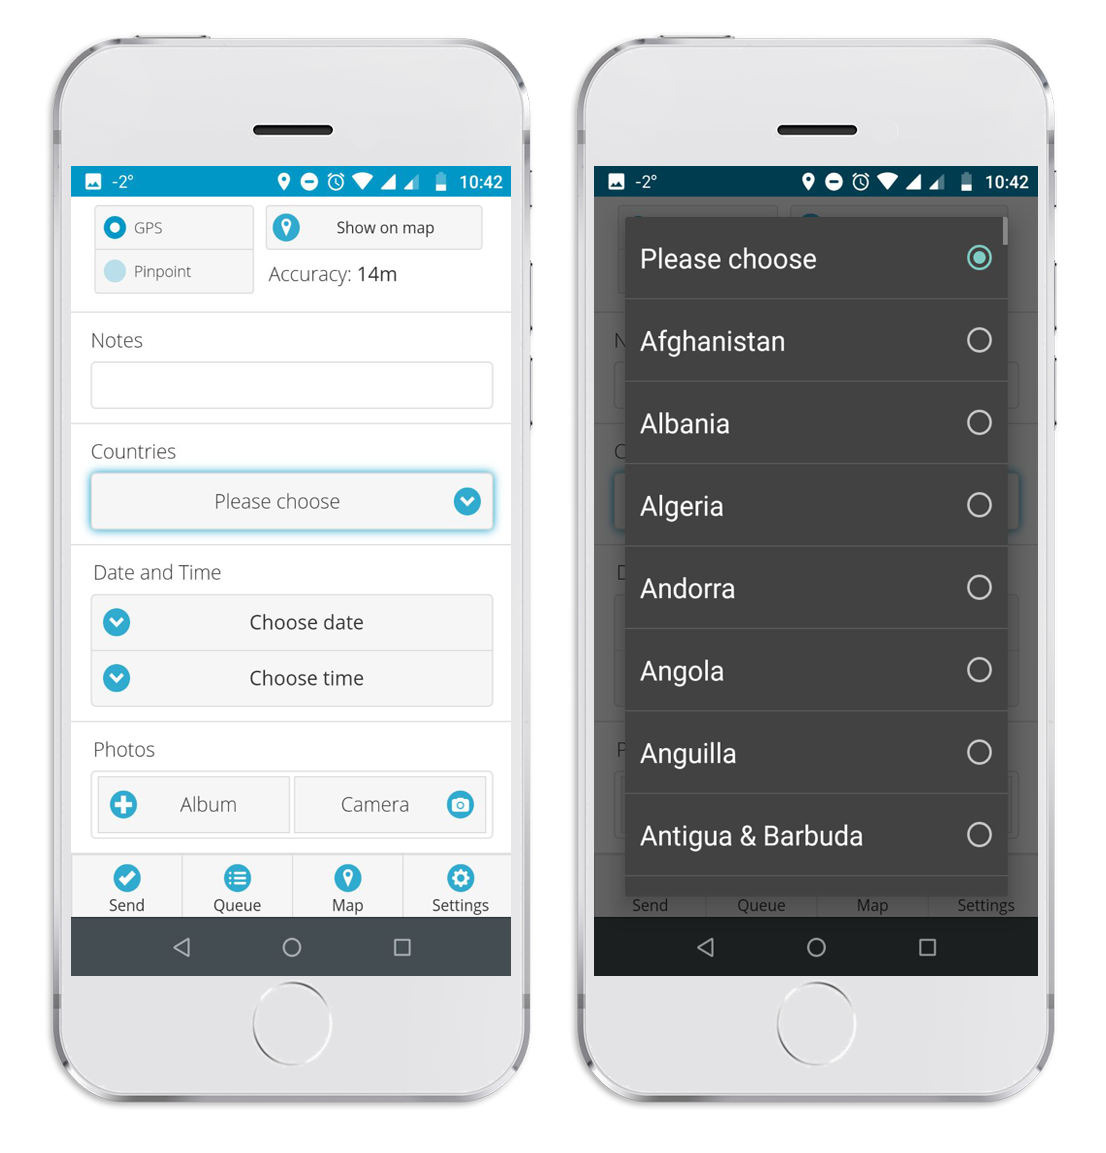
Now you’re ready to collect data in the field. Open the Mobile Data Collection on your device and under Settings click ‘Maps and Layers’, select the map you duplicated in the previous step and select the Layer in that map.
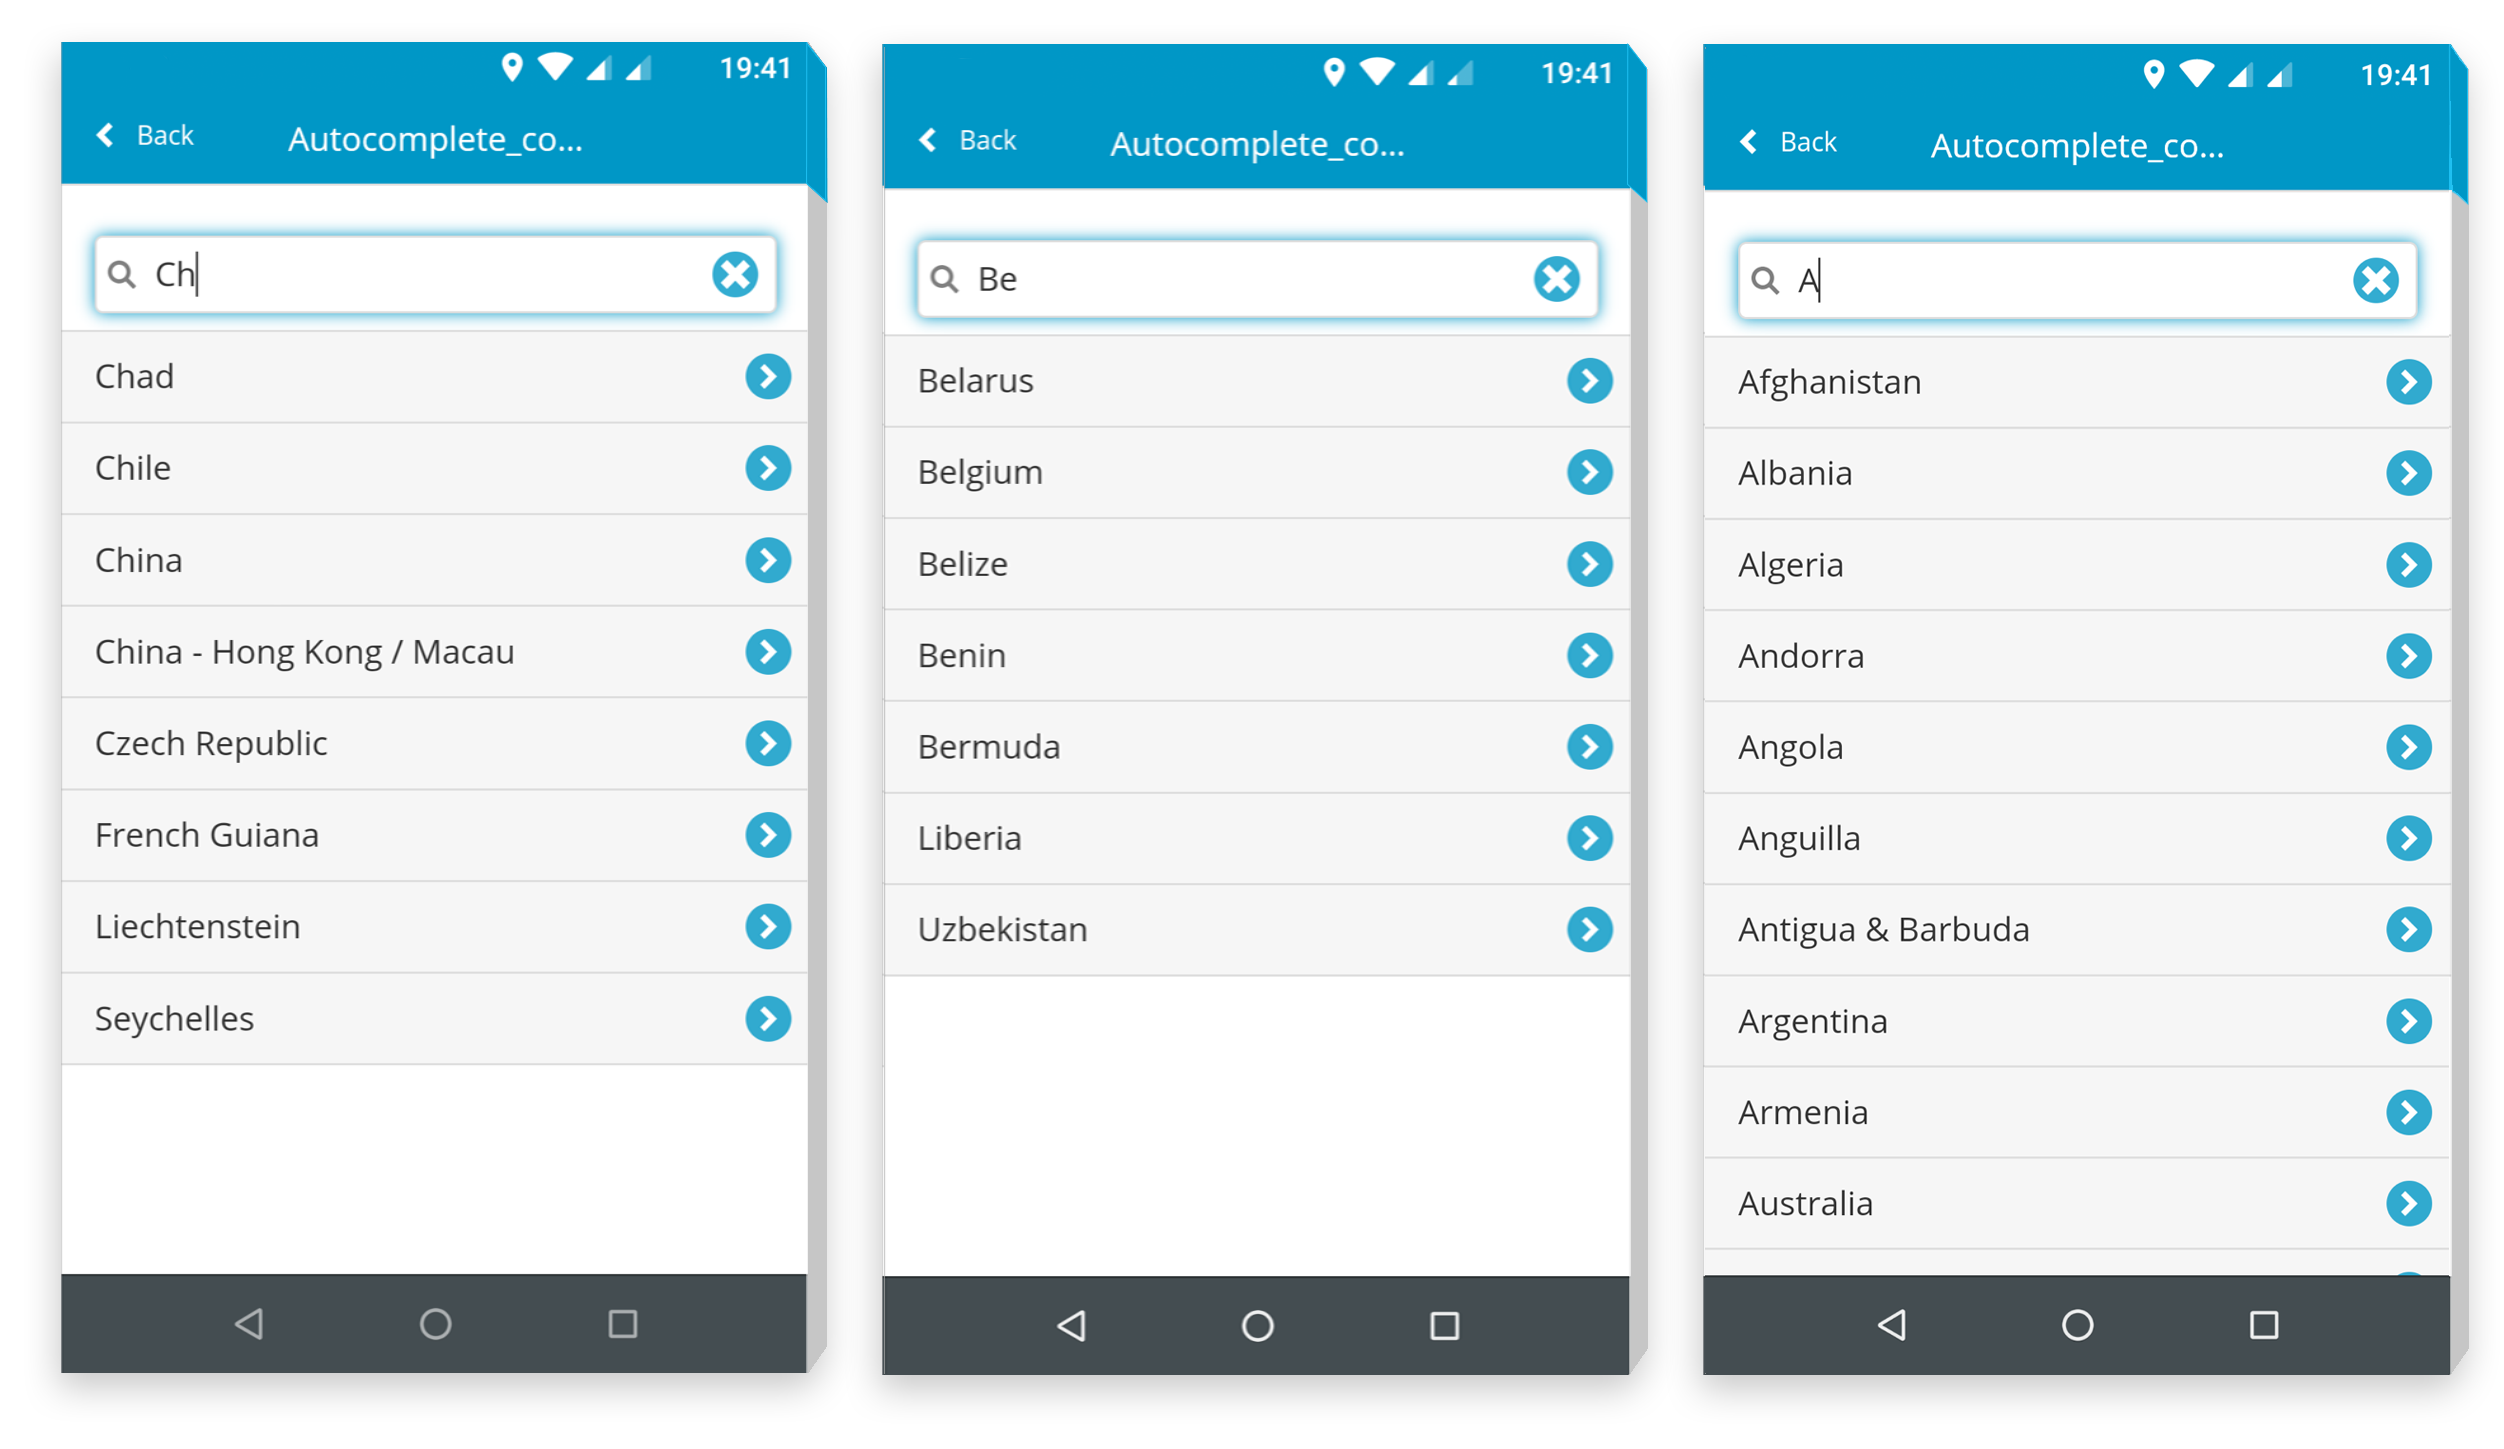
Bonus Guide: Create an autocomplete text field for a list of items via JSON
If you’d prefer to have an autocomplete text field with a fixed list of values follow the next steps. You’ll notice that the procedure is quite similar to the former one. Let’s begin.
Learn more about autocomplete fields in this manual.
To prepare the data follow the exact same steps from the first section at the beginning of the article.
When the data is ready, create a new form or load an existing one in Forms Manager click ‘Add new field’ and choose a ‘Text’ type. Name the field ‘Autocomplete_countries’ and click ‘Save.’
Now click ‘Switch to JSON view.’
Find the part with your newly created text field called ‘Autocomplete_countries’:
{
“type”: “text”,
“uuid”: “bf980a80-8334-4219-be05-5ce9f429034e”,
“name”: “Autocomplete_countries”,
“persistent”: false,
“required”: false,
“readOnly”: false,
“title”: “”,
“description”: “”
}
Under the part ‘’description’’ add:
“autocomplete”: {
“data”: Paste the JSON code containing the items here
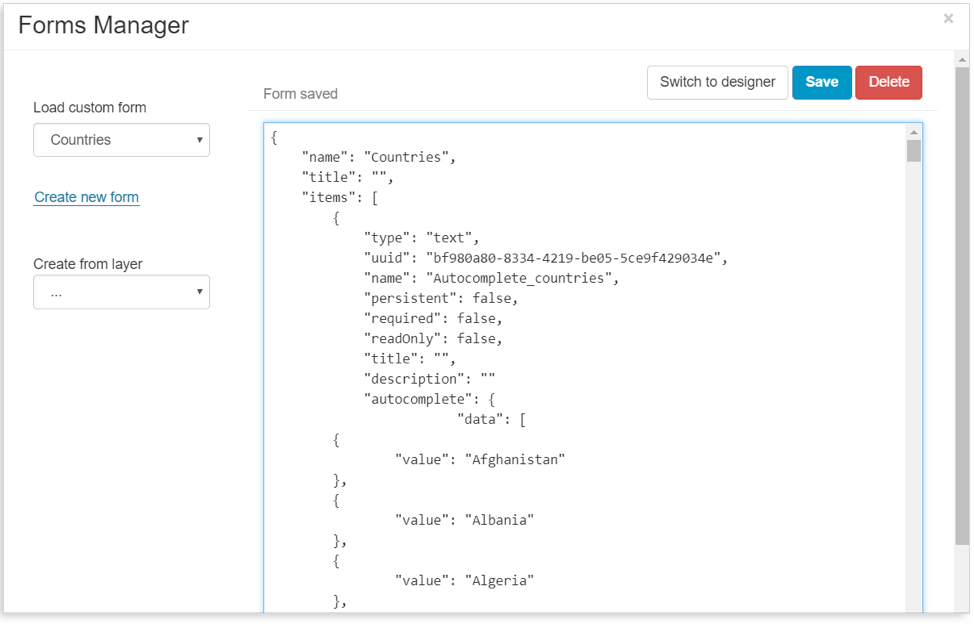
The final result should look like this:
{
“name”: “Countries”,
“title”: “”,
“items”: [
{
“type”: “text”,
“uuid”: “bf980a80-8334-4219-be05-5ce9f429034e”,
“name”: “Autocomplete_countries”,
“persistent”: false,
“required”: false,
“readOnly”: false,
“title”: “”,
“description”: “”
“autocomplete”: {
“data”: [
{
“value”: “Afghanistan”,
“title”: “Afghanistan”
},
{
“value”: “Albania”,
“title”: “Albania”
},
{
“value”: “Algeria”,
“title”: “Algeria”
},
{
“value”: “Andorra”,
“title”: “Andorra”
}
]
}
}
]
Don’t forget to click Save.
The next step is to open the Forms Manager and connect the form fields. Open the layers properties and connect the layer and the new form following the instructions here.
Now you can start collecting field data. Open your MDC mobile app and under the tab ‘Maps & Layers’ find your map. When you open the form and start typing, results should appear as in these pictures: