Spatial Selection examples
>>> Open our test map in Map Viewer to perform spatial selection following our tutorials
Table of Contents
Important notes:
- Spatial selection only works with database layers, not with files. If you want to perform spatial queries please import files you need into the database first.
- Make sure that the multigeometry type is exploded into basic geometry.
- If you are going to perform spatial selection in two or more different layers, make sure they are in the same projection! Learn how to change the projection of a layer in GIS Cloud here.
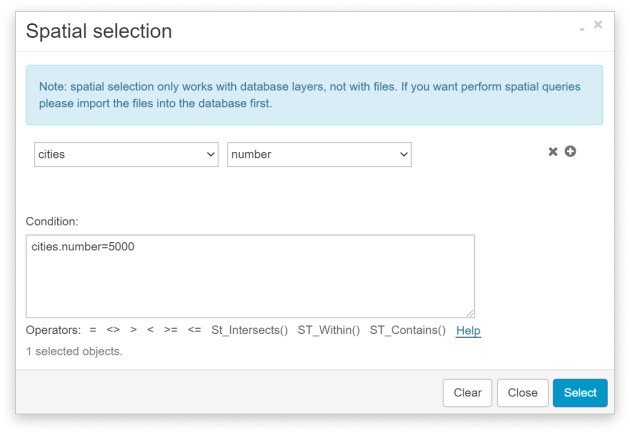
Example 1. Numerical operator
Select town with a population of 5000.
- Click Feature tab and Spatial Selection icon.
- Select table cities and column number.
- Write =5000
- Click Select.
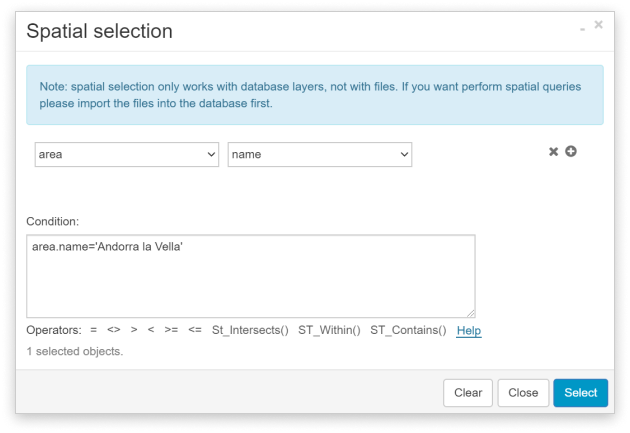
Example 2. Text operator
Select town with the name Andorra la Vella.
- Select layer area and column name.
- Write (don’t copy and paste) =’Andorra la Vella’.
- Click Select.
Note: Make sure that you put single quotes (i.e., ’giscloud’) for String (text) attributes. Attributes are case sensitive!
Example 3. Using the AND operator
Select counties that belong to the ‘U’ zone and have an area less then 0.012511.
- Select layer area and column zone.
- Write (don’t copy and paste) =’U’.
- Write AND operator.
- Select layer area and column shape_area.
- Write <0.013
- Click Select.

Example 4. Using the OR operator
Select both primary and secondary routes.
- Select layer roads and column route.
- Write (don’t copy and paste) =’Primary Route’.
- Write OR operator.
- Again select layer roads and column route.
- Write (don’t copy and paste) =’Secondary Route’.
- Click Select.

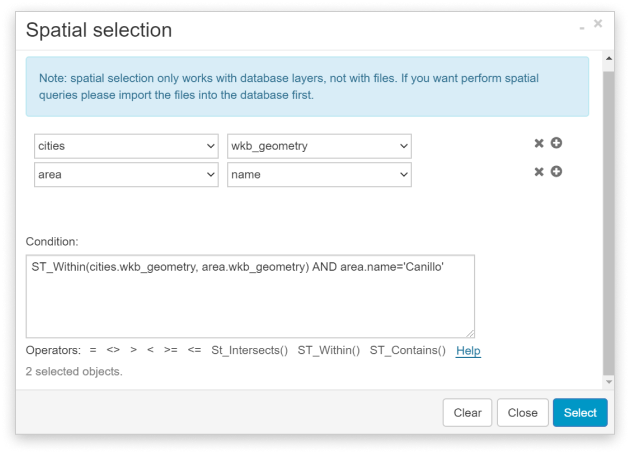
Example 5. Using spatial operators (ST_Within)
Select towns inside Canillo county.
- Select ST_Within() operator.
- Select layer cities and wkb_geometry column.
- Note: to add another table click “+” button.
- Select layer area and column wkb_geometry.
Query ST_Within(and_cities.wkb_geometry,and_adm1.wkb_geometry) will select all point features within all polygon features. We want to specify county (polygon) with name (attribute) ‘Canillo’: - Write AND operator.
- Select area and name column.
- Write (don’t copy and paste) =’Canillo’.
- Click Select.
Note: wkb_geometry field has information about geometry in the binary form.
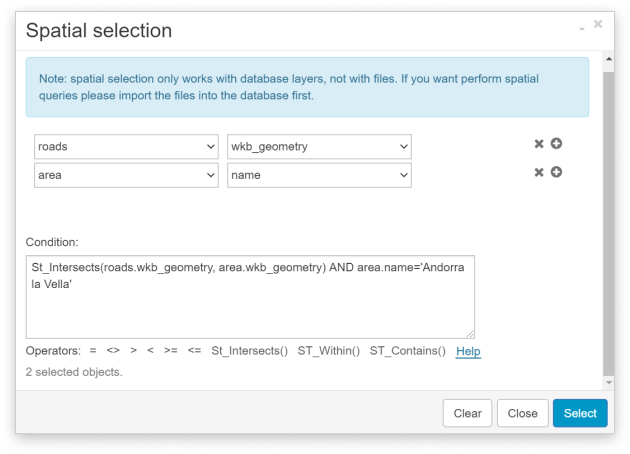
Example 6. Using spatial operators (ST_Intersects)
Select roads that intersect Andorra la Vella county.
- Select or write St_Intersects().
- Select layer roads and column wkb_geometry.
- Click + to add another table.
- Select layer area and column wkb_geometry.
- Write operator AND.
- Select layer area and column name.
- Write (don’t copy and paste) =’Andorra la Vella’.
- Click Select.
Here is a map with the spatial selection examples results:
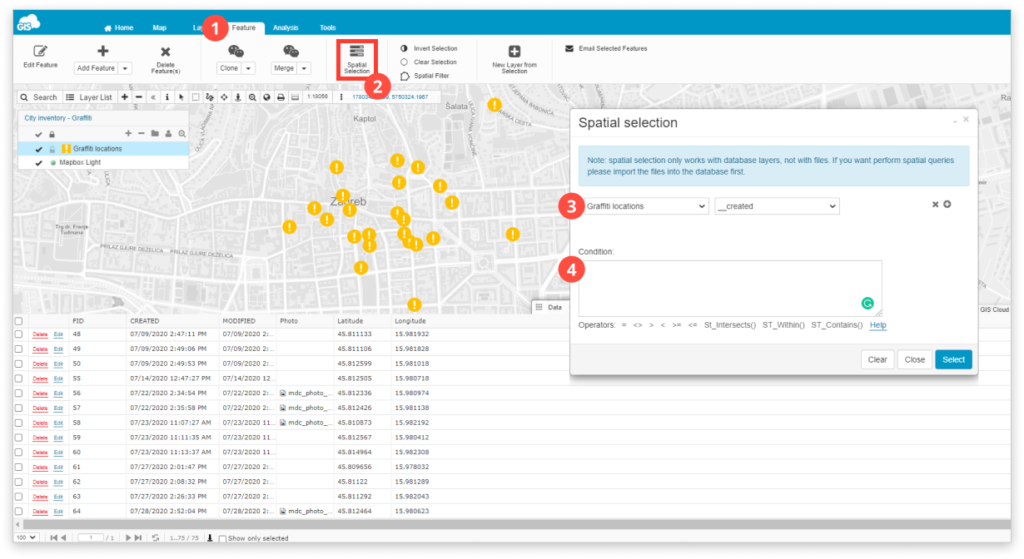
Example 7. Time & Date Selection
To perform a spatial query based on a date/time field, follow these instructions:
- Open the Feature tab in Map Editor.
- Press Spatial Selection.
- Choose the table (layer) and the column on which you want to make the selection.
- Write the selection condition.
Important notes!
When writing selection conditions, the date should be written in the UTC format, not local time.
Also, it should be written without seconds, AM/PM and time zone information.
Allowed operators for Time and Date selections are:
- = equal
- <> not equal
- < less than
- <= less than or equal to
- >= greater than or equal to
- > greater than
- AND operator
Examples
The selection process is the same for all date and time columns in GIS Cloud. In these examples, we will be selecting features from the CREATED column in the time zone GMT/UTC +2.
The CREATED column is an automatically populated field in GIS Cloud that fills out when a new feature is created on the map. Learn more about date and time fields here.
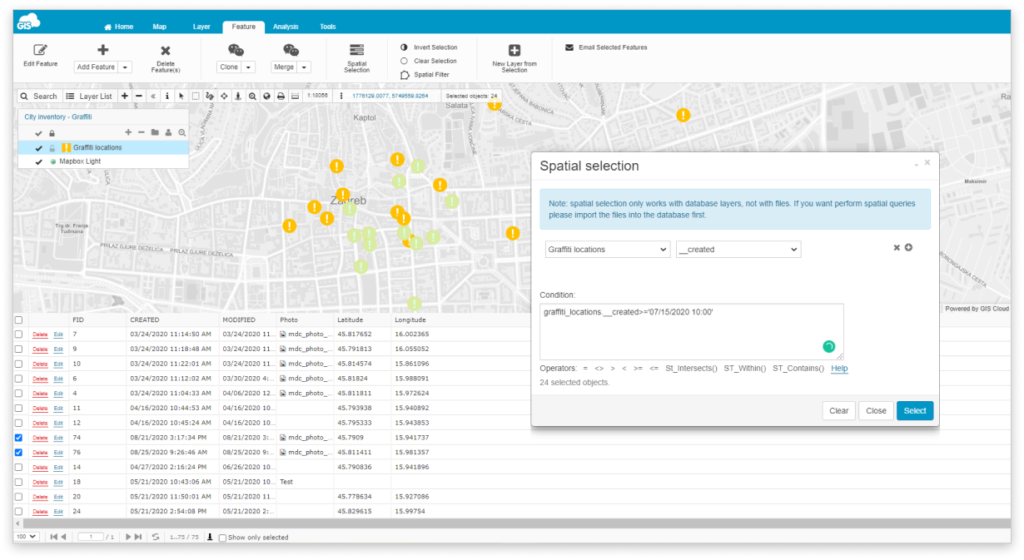
1. Select features created from 15th of July 2020 at 12:00 PM (local time) until now in the time zone GMT+2
Time string from the Datagrid (local time): ‘07/15/2020 12:00:02 PM’
The string you should write in the condition (UTC): ‘07/15/2020 10:00’
Since we would like to choose features created from the specific date, we only need one operator: >= greater than or equal to.
This is how the condition box should look like:
graffiti_locations.__created>=’07/15/2020 10:00′
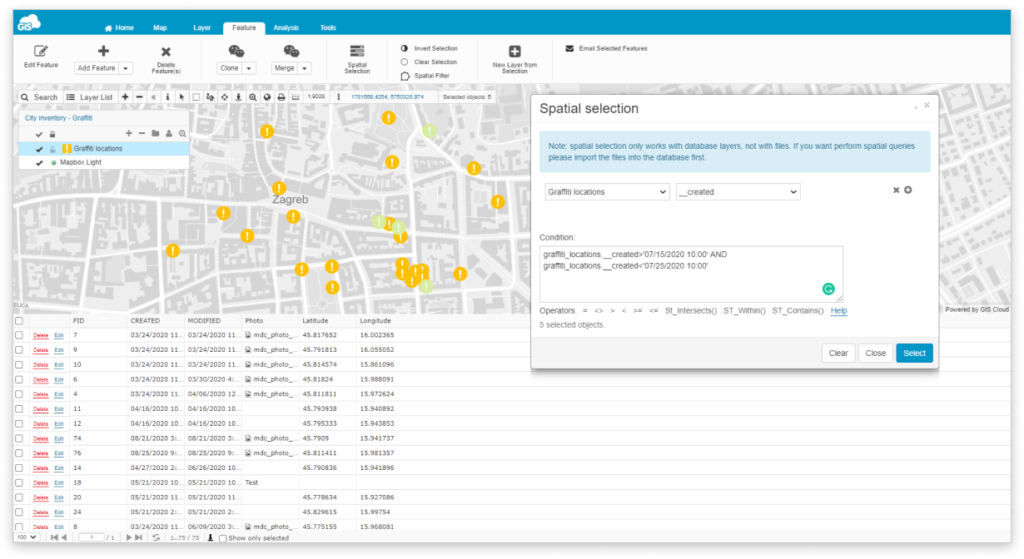
2. Select features created between 15th of July 2020 at 12:00 PM and 25th of July 2020 at 12:00 PM in the time zone GMT+2
Time strings from the Datagrid (local time): ‘07/15/2020 12:00:02 PM’, ’07/25/2020 12:00:02 PM’
The strings you should write in the condition (UTC): ‘07/15/2020 10:00’, ’07/25/2020 10:00′
Since we need would like to choose features created between two dates, we need three operators:
- < less than
- > greater than
- operator AND
This is how the coondition box should look like:
graffiti_locations.__created>’07/15/2020 10:00′ AND graffiti_locations.__created<’07/25/2020 10:00′
3. Select features created at midnight (local time)
Time string from the Datagrid (local time): ‘07/15/2020 00:00:01 AM’
The string you should write in the condition (UTC): ‘07/14/2020 22:00’
Since we would like to choose features created exactly at midnight, we only need one operator: = equal.
This is how the condition box should look like:
graffiti_locations.__created=’07/14/2020 22:00′
Example 8. Using selections with buffers
You can combine the Spatial Selection tool with other Analysis tools available in the Map Editor, for example with the Buffer tool. Let’s say you want to see how many trees are within 15 meters of a road within a certain area (we’ll assume you have a road layer and a layer with the tree locations).
- Open the Analysis tab, and create a 15m buffer layer around the roads (choose the roads layer in the Buffer tool, and set the distance to 15 meters).
- Save the buffer (click on Show buffer) and open the Spatial Selection tool in the Feature tab.
- Set up a condition that will check whether the features in the trees layer intersect the buffer layer, and select those that do:
- Choose the ST_Intersects operator, and move the cursor indicator in front of the comma.
- First, select the tree layer in the Tables dropdown, then in the Columns dropdown select wkb_geometry.
- Move the cursor indicator after the comma, and add a new table – select the buffer layer, and in the Columns dropdown select wkb_geometry again.
- Your condition should look something like this: St_Intersects(tree_locations.wkb_geometry, buffer_030424_124451.wkb_geometry), where tree_locations and buffer_030424_124451 are the table names (layers can be named differently).
- Click on Select.
- All trees that are located within that buffer are now selected!