How to upload your data to GIS Cloud?
Before uploading any kind of data, we recommend that you first check out the supported data types. Now, after you have confirmed that your data type is supported by GIS Cloud, the uploading can start!
There are several ways to upload files into GIS Cloud:
1. Drag & Drop
A simple way to upload your data from your local file system to your GIS Cloud account, is to simply drag your spatial data from your folders to the application running in your browser. Just make sure you’re logged in to Map Editor and you drop all the necessary files in the Home Tab/Map Gallery or inside of a map. Either way, data will be uploaded into your File Manager.
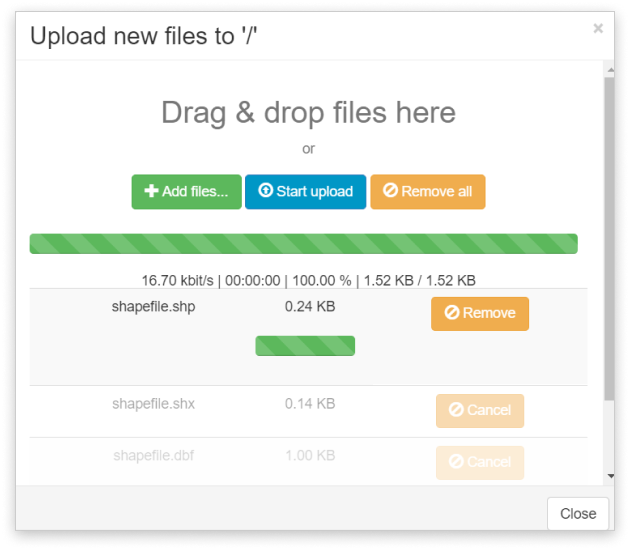
2. Upload through the File Manager
In the File Manager select a directory to which you would like to upload your data and select the Upload button. Then, select Add files to choose files from your computer or Drag & Drop files into the browser window, click open and wait for the upload to finish. The data will be uploaded into your File Manager.
3. Upload through the SFTP client
You can access, upload and maintain your data by connecting to GIS Cloud with Secure File Transfer Protocol clients. It offers you a new way of syncing your data with the GIS Cloud in addition to fast and secure file upload. Any data which is bigger than 500 MB needs to be uploaded with SFTP client. Learn how to set it up here.
4. Import CSV or XLS.
If you have location coordinates data, you can upload it as an Excel table (XLS) or CSV. Once you upload it, the data can easily be imported into the database and added to a map as a layer. Besides spatial data, it enables you to import non-spatial tables in the database as well. All you need to know is here.
When you upload your data, it will be stored in your File Manager. When a layer resides in the File Manager, you can show it on a map, however, it is not editable.
A layer from the File Manager is added to a map as shown below:
- Select Add Layer from the Layer or Map tab.
- Select File Manager from the dropdown menu.
- Select a layer you want to add into the map.
- Add it by clicking on the Select option.
To be able to edit your data on a map, you must import it to the database.