How to set up backup for my data?
Layers from GIS Cloud maps can be periodically exported locally on the computer.
There are a few steps that you need to follow to set everything up.
The first step is to download and unzip the script for an automatic backup of your data.
Click here to download the GIS Cloud backup script for Windows.
Click here to download the GIS Cloud backup script for Linux.
Table of Contents
Set backup for Windows
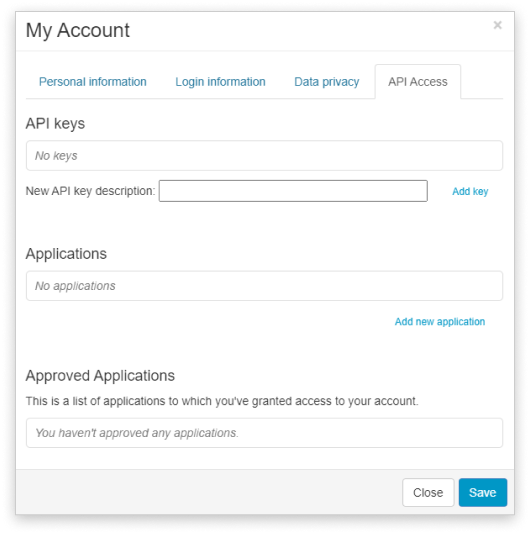
Generate a new API key
API key is unique for each user and is used to identify the user and to check if the user has export permission on the layer.
- Open My Account in Map Editor.
- Open API Access tab.
- Type in a new name for the key in New API key description and click Add key.
- Copy the created key as you will need it later for the setup!
Find layer ID
While you are still in Map Editor, the next step is to copy the layer ID for which you want to set up backup. Note that you can backup only layers for which you have the export permission.
- Open the map in which the layer is added.
- Go to Layer Properties (Layers tab – Edit layer).
- Under General tab click More info button.
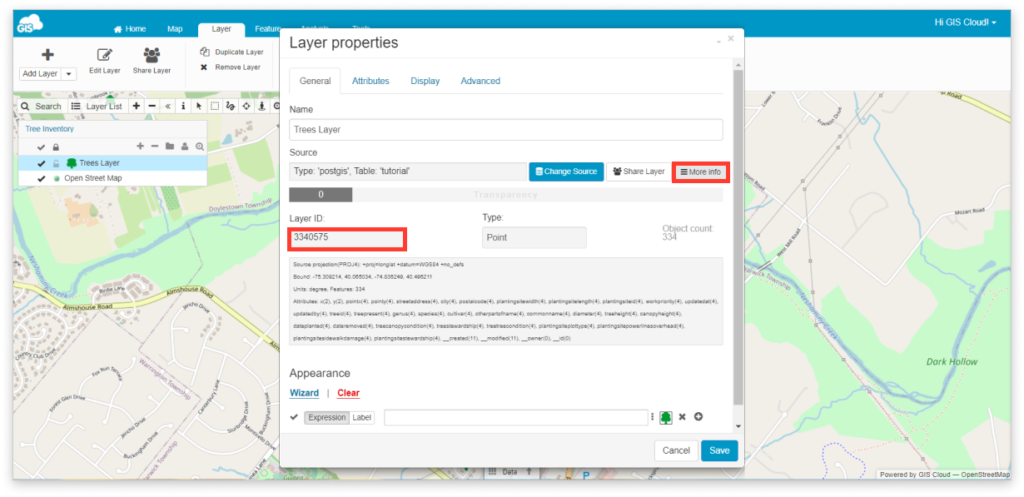
- Copy the layer ID as you will need it later in the setup!
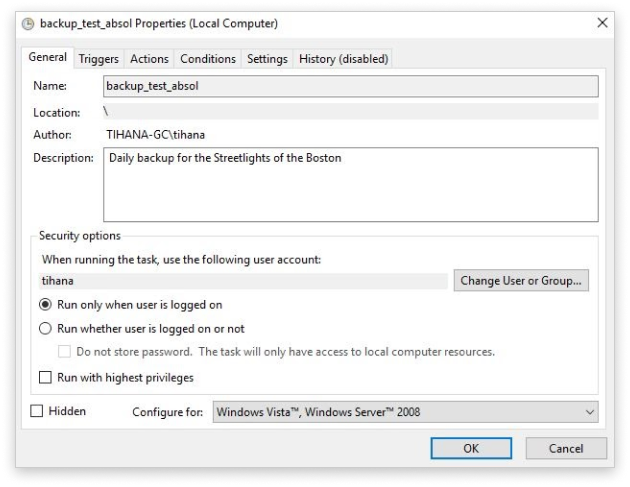
Create a new task in Task Scheduler for Windows
The next step is to create a task for a daily backup. In this example, we will use the Task Scheduler for Windows. Task Scheduler is located in Control Panel – System and Security – Administrative Tools – Task Scheduler.
1. Define the name of the backup task in the General tab.
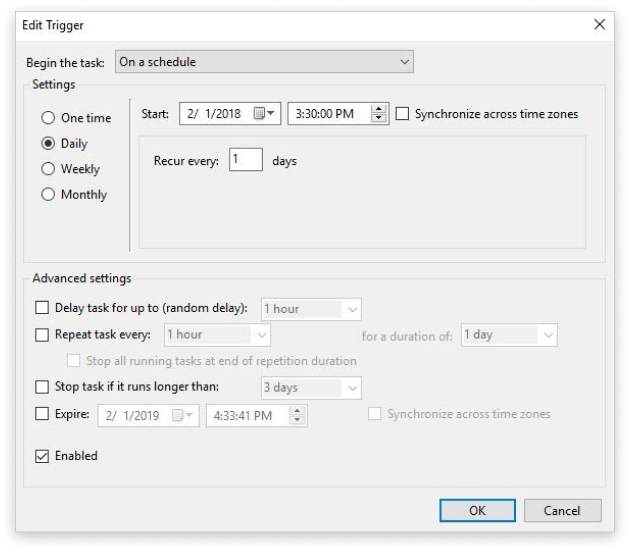
2. Create the trigger for initialization of the backup process.
3. Create an action for the trigger.
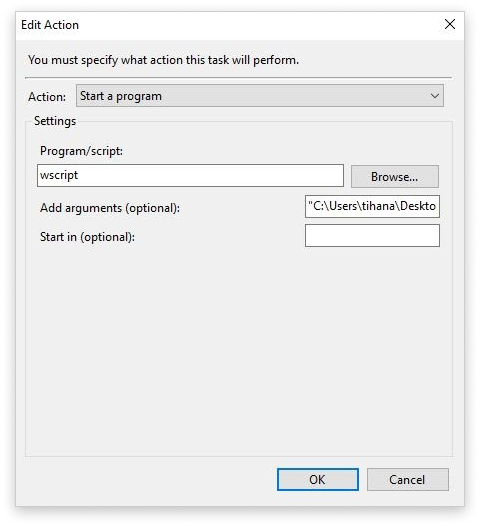
To create an action we will need an API key, layer ID, path to the script and path to the location in which data will be stored (more details can be found in “readme.txt” file)
4. In the Program/script enter “wscript”
5. In the Add arguments box copy the path to the script, API key, layer ID and path to the location in which data will be stored. Below is a short breakdown of everything that needs to be included in the arguments box, with examples:
- path to script –> “C:\Users\GISCloud\Desktop\gc-export\gc-export.wsf”
- ID of the layer which you are backing-up –> layer: your_layer_ID
- Your API key which you generated from the My Account window –> apikey:your_API_key
- path to where the backed-up data will be stored –> “D:\Layers\Backup”
A full arguments example can be found below:
“C:\Users\GISCloud\Desktop\gc-export\gc-export.wsf” /layer:your_layer_ID /apikey:your_API_key /dest:”D:\Layers\Backup”
6. Default export format is ESRI Shapefile, but you can add an argument to export to a different format: /format:<export format>
Possible <export format> values are:
- “esri shapefile”
- “mapinfo file”
- “csv”
- “dxf”
- “kml”
The export format argument must be added between the layer ID and API key arguments, like in the example below:
“C:\Users\GISCloud\Desktop\gc-export\gc-export.wsf” /layer:your_layer_ID /format:”csv” /apikey:your_API_key /dest:”D:\Layers\Backup”
Notes:
- The path to the exported layer (/dest:C:\Users…) shouldn’t have any spaces as it causes the error when executing the script.
- Check if you copied all the quotes and all necessary spaces.
These steps will ensure that your backup is done by the defined parameters.
Test the script by clicking Run in Task Scheduler. In log.txt you can if the layer is successfully downloaded. The layer should be stored in the defined folder.
Note: It is necessary that the computer is turned on at the time of the backup.
Set backup for Linux
To back up once a week on Sunday, set up a crontab job like this:
0 2 * * 7 /usr/bin/bash <path to gc-export.sh> -l <layer id> -k <API key> -d <destination directory> > <path to log file> 2>&1 Replace /usr/bin/bash with the location of your bash executable. It can be in a different location depending on your OS or setup. The location of the executable can usually be checked with command:
which bashThe default export format is ESRI Shapefile, but you can add an argument to export to a different format:
-f <export format>Possible <export format > values are:
“esri shapefile”
“mapinfo file”
“csv”
“dxf”
“kml”
Don’t forget the quotes! e.g. -f “esri shapefile”
Of course, the user running the script must have permissions to write to the destination directory.